

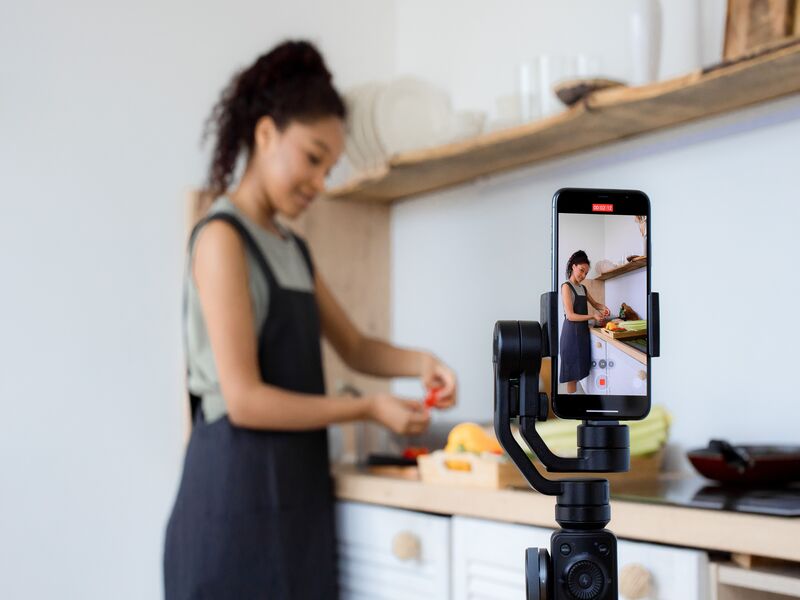
Mastering how to edit videos on iPhone does not require professional experience, and most users can start creating polished videos within minutes. You do not need a laptop, expensive software, or advanced editing skills to create clean, shareable videos.
Whether you’re using Photos, iMovie, or another free editor, your iPhone provides everything needed to cut footage, enhance visuals, merge clips, and optimize content for popular social media channels.
1. How to Edit Videos on iPhone for Free?
Before choosing an app, it helps to understand what your iPhone can already do. Many basic edits can be completed without paying for a subscription, especially if you only need to clean up short clips or create simple social media videos.
Use Built-In Editing Tools
The Photos app lets you trim footage, crop the frame, rotate clips, adjust brightness, improve contrast, and apply filters.
Try Free Video Editing Apps
If you need more creative control, free apps like iMovie, CapCut or Canva can help you combine clips, add music, insert text, and export videos in different formats.
Choose the Right Free Option
For quick edits, Photos is enough. For storytelling, iMovie works well. If your focus is creating quick vertical videos, apps such as CapCut often offer a more streamlined editing workflow.
The best tool depends on whether you are editing family videos, school projects, TikTok clips, or YouTube content.
2. How to Edit Videos on iPhone Using the Built-In Photos App?
If you want the fastest method, start with the Photos app. This is the easiest way because everything is already available in your gallery.
Step 1: Open the Photos App
Go to the Photos app and find the video you want to improve. Tap the clip to open it in full-screen view.
Step 2: Select a Video
Choose the video carefully, especially if you have several similar clips. Pick the version with the clearest sound, best lighting, and most stable footage.
Step 3: Tap Edit
Tap Edit in the corner of the screen. This opens Apple’s built-in video editor, where you can adjust timing, framing, color, and filters.
Step 4: Trim, Crop, or Adjust the Video
Drag the timeline handles to cut out unwanted parts at the beginning or end. You can also crop the frame, straighten the shot, change exposure, increase sharpness, or adjust saturation for a cleaner look.
Step 5: Save Your Changes
When everything looks right, tap Done. Your iPhone will save the edited version, but you can still revert to the original later if needed.
>>> Read more: How to Screen Record on iPhone: Brilliant Ways to Capture Every Important Moment
3. How to Edit and Combine Multiple Videos Together on iPhone?
The Photos app is useful for single clips, but combining several videos usually works better in iMovie or another editing app.
Combine Multiple Clips into One Video
Open iMovie and create a new movie project. Select the clips you want to use, then add them to the timeline.
Rearrange Clips in the Desired Order
Once your clips are in the project, drag them into the order you want. A strong video usually starts with the most interesting moment, then moves into supporting scenes.
Add Transitions Between Scenes
Use simple transitions to connect scenes smoothly. Avoid adding too many flashy effects because they can make the video feel messy or distracting.
Save the Finished Video
After editing, export the video to your Photos app. From there, you can upload it to YouTube, TikTok, Instagram, or send it directly to friends.
4. Common Video Editing Mistakes to Avoid
Even simple videos can look much better when you avoid a few common problems.
Overusing Effects and Transitions
Effects should support the story, not take attention away from it. Use transitions only when they help the video flow naturally.
Exporting at the Wrong Resolution
A video may look blurry if exported in the wrong quality. For most platforms, 1080p is a safe choice. For higher-quality projects, 4K may be better if your original footage supports it.
Using Low-Quality Audio
Good sound matters as much as good visuals. If the background noise is too loud, reduce it, replace it with music, or record a clearer voiceover.
Forgetting to Save the Original Video
Before making major edits, keep a backup copy. This gives you more freedom to experiment without losing the original footage.
5. Pro Tips for Editing High-Quality YouTube and TikTok Videos on iPhone
If your goal is to post online, you need to edit with the platform in mind.
Keep Clips Short and Focused
Cut anything that feels slow, repeated, or unnecessary. Strong videos move quickly and keep viewers interested from the first few seconds.
Improve Lighting and Sound
Bright, clear footage always looks more professional. Try filming near natural light and avoid noisy places when recording speech.
Use Consistent Transitions
Limiting your project to a small set of transition effects can create a cleaner and more professional viewing experience. This helps the video feel cleaner and more intentional.
Choose the Right Aspect Ratio
Use vertical format for TikTok, Instagram Reels, and YouTube Shorts. Use horizontal format for standard YouTube videos.
6. Conclusion
Learning how to edit videos on iPhone gives you a fast, flexible way to create better videos without using a computer. Start with the Photos app for simple edits, move to iMovie or free editing apps for longer projects, and always match your format to the platform you plan to use.
With the right steps, your iPhone can become a powerful editing tool for everyday clips, YouTube videos, and short-form content.